
 1. I compile a basic placement layout in Illustrator. I then put this into a very light greyscale and print it out.
 2. I then sketch the characters onto the basic layout print.
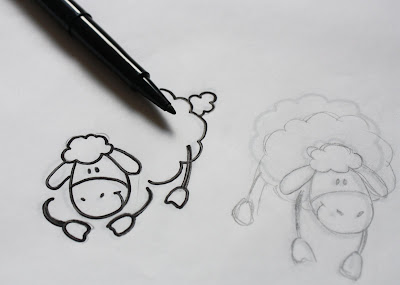 3. I trace over the sketch in ink (I sometimes repeat this process a few times till I'm happy they're just right).
 4. The ink sketch is then scanned in as a 300dpi bitmap and converted to greyscale in Photoshop. I usually play around with the lines in photoshop until I'm happy with them. I use a wacom pen tablet for all of my digital drawing. I then turn it back into a bitmap which I think gives the best results when live tracing.
 5. I copy the bitmap and paste into the Illustrator layout document. I then live trace the design and neaten up the lines again.
 6. I then compile the design in Illustrator and label any applique or embellishment elements.
 7. I then use the print elements to create a complimentary all-over repeat design. I like to present the designs mocked up onto garments so I create a pattern tile of the repeat and apply that to the pyjama bottoms. I could scale down the placement print and use that on a t-shirt blank, but this would make the file larger. instead, I export the illustrator placement artwork into photoshop on a transparent background, save as a .png and then place that back in illustrator.
Working in this way means I get a nice un-uniform line quality that is still controlled and smooth. I neaten up my lines at every opportunity. One of my bugbears is rogue vectors and nasty jerky lines. I work in very different ways when creating watercolour style prints or photo-realistic textural designs. I might write a step-by-step guide on those one day!

cool, thanks for sharing!
ReplyDeleteyou're welcome!
ReplyDelete